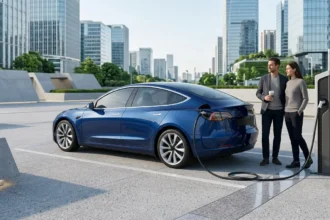
An electric car charger for home is simply a device (sometimes called EVSE) that delivers power from your house to your EV’s battery. In 2026, the best home charger is typically a 240V Level 2 unit (40–48 amps, about 9–11 kW) that fully charges most EVs overnight. Level 1 (120V) chargers use a standard outlet but add only ~2–5 miles of range per hour, whereas Level 2 chargers add roughly 10–30+ miles per hour. Of course, the “best” charger depends on your needs: look for the right connector (J1772 or Tesla’s NACS), sufficient power for your daily driving, and features you want (smart app control, weatherproofing, etc.). We’ll explain all this below, including types, costs, installation, and tips.
Featured Answer: A Level 2 (240V) home charger rated 40–48 amps is generally the best choice. It supplies about 10–30+ miles of range per hour, enough to fill an EV overnight. Pick a reliable, weather-rated model with the correct plug (standard J1772 or Tesla/NACS) and useful features (like Wi-Fi scheduling).
What Is an Electric Car Charger for Home?
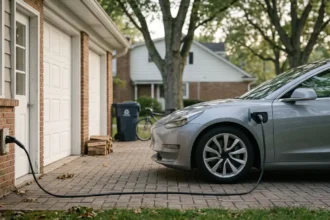
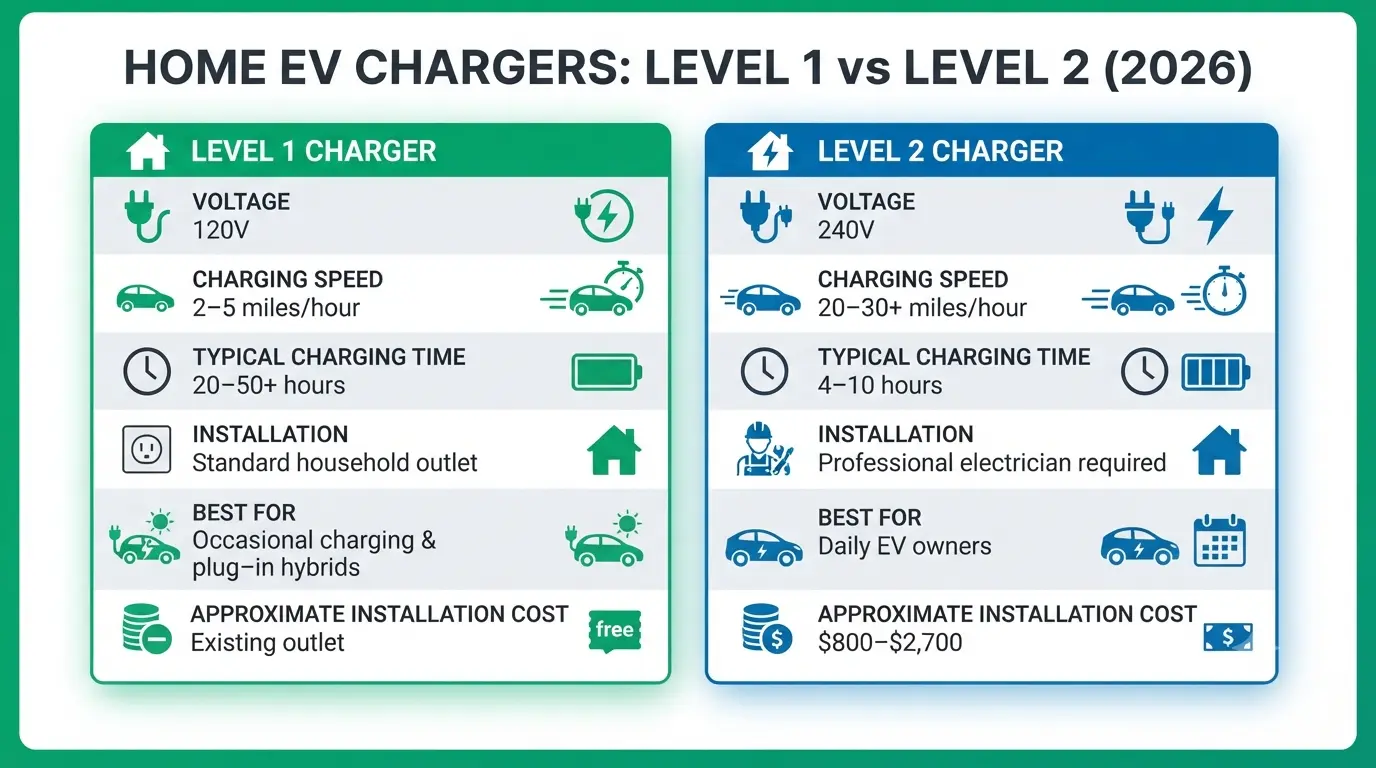
A home electric car charger (EVSE) is the equipment you mount in your garage or driveway to recharge an EV. A basic home charger uses a Level 1 outlet (120 volts), like the one for your toaster, to provide ~1.4–1.9 kW (15 amps) of charging. That only adds about 2–5 miles of range per hour of charging. It works for plug-in hybrids or backup charging, but it’s very slow for modern EVs.
By contrast, a Level 2 home charger uses a 240V circuit (like a dryer outlet) and delivers much more power (commonly 6–12 kW). In practice, a Level 2 charger typically adds 10–35 miles of range per hour of charging. (For example, a 40A charger on a 60 kWh EV can add roughly 20–25 miles each hour; a 48A unit can deliver ~30 miles/hour.) This means most EVs can go from near-empty to full in 4–10 hours, making overnight charging very practical.
Chargers connect to your car through a plug: in North America most EVs use the SAE J1772 (Type 1) connector, while Tesla uses the newer NACS plug. Many chargers today come with one or the other, or even a built-in adapter. (For example, Tesla’s Universal Wall Connector now supports both plug types.) When choosing a home charger, make sure it’s compatible with your vehicle or has an adapter.
For more background on EV charging, see our EV Charging Guide. In short: for routine daily charging, most owners install a Level 2 unit at home. This requires a 240V electrical circuit and usually a professional installation, but the payoff is fast, convenient charging every night.
Level 1 vs Level 2 EV Charger
Level 1 and Level 2 are the standard home charging levels. The table below compares them side by side:
| Charger Type | Voltage | Added Range per Hour | Installation | 80% Charge Time | Best For | Approx. Install Cost |
|---|---|---|---|---|---|---|
| Level 1 (120V) | 120V AC | ~3–5 miles | Standard outlet (no new install) | ~40–50+ hours | Short trips, PHEVs, backup use | ~$0 (uses existing outlet) |
| Level 2 (240V) | 240V AC | ~20–30 miles | Dedicated 240V circuit & outlet (electrician) | ~4–10 hours | Daily EV drivers, long-range | ~$800–$2,700 |
- Charging Speed: Level 1 (120V) adds only a few miles of range per hour, so it can take a couple of days to fully recharge a large EV. Level 2 (240V) is much faster – typically tens of miles per hour, enough to fill a drained battery overnight.
- Installation: Level 1 just plugs into a normal home outlet (no electrician needed). Level 2 requires a 240V circuit (like for a dryer). An electrician will run the cable, install a 40A–60A breaker, and possibly mount a receptacle (NEMA 14-50) or hardwire the charger.
- Cost: Using a Level 1 charger is essentially free (just your normal electricity). A Level 2 charger unit costs a few hundred dollars, and the installation typically runs $800–$2,700 in the U.S, depending on wiring complexity and panel upgrades.
- Best For: Level 1 might suffice for short-range plug-in hybrids or very low daily mileage. But for full EVs and regular drivers, a Level 2 charger is far more practical. Almost all EV experts and guides recommend upgrading to Level 2 at home so you wake up each day with a full battery.
(For routine servicing, battery care, and long-term ownership tips, see our Electric Car Maintenance Guide)
How to Choose the Best Home EV Charger
Power and Amperage. Modern home chargers typically offer 30A, 40A or 48A (the breaker is sized slightly higher, usually 50A or 60A). A 48A (around 11.5 kW) charger is max power for most houses and EVs – it gives the fastest charge (up to ~35 miles per hour). However, a 40A (9.6 kW) charger is still quite capable and often cheaper. For most U.S. homes, a 48A charger on a 60A breaker is ideal. (In Europe or other regions, chargers might be rated differently, but the principle is the same: higher amperage = faster charging, if your car and panel allow it.)
Connector Type. Ensure the charger’s plug matches your EV. In North America, J1772 (Type 1) is standard for most EVs and plug-in hybrids. Tesla vehicles and many new models (after 2025) use the Tesla NACS plug. There are chargers with built-in adapters or “universal” connections. If you have a Tesla and a non-Tesla in the same household, consider a charger that supports NACS or plan to use an adapter.
Hardwired vs. Plug-in. Many Level 2 chargers come in two installation styles: hardwired (permanently connected to the circuit) or plug-in (into a NEMA 14-50 outlet). A hardwired charger looks neater and can handle up to 48A reliably. A plug-in charger on a 50A outlet (which actually supplies 40A continuously) gives flexibility: you or a future homeowner can unplug and move the charger easily. Both types work well – it’s mostly a question of convenience and whether you want the permanent install or a portable unit.
Smart Features. Decide if you want a “smart” charger. Smart chargers have Wi-Fi or Bluetooth, allow scheduling, power monitoring, and sometimes load sharing (adjusting charge power if your panel is near capacity). For example, the Emporia Pro supports load management and solar integration, and the Tesla Wall Connector offers app-based scheduling (for Tesla vehicles). If you have time-of-use electricity rates, being able to schedule charging overnight can save money. On the other hand, a basic no-frills charger still works fine and is often cheaper.
Outdoor Rating. If you plan to mount the charger outside or in an open garage, pick one with a high weatherproof rating (NEMA 4/IP66). This protects against rain, dust, and temperature swings. Some lower-cost chargers are indoor-only. For example, the Grizzl-E Ultimate 48 is praised for its rugged outdoor housing. Check that the unit says it’s rated for outdoor installation if needed.
Cable Length. Make sure the charger’s cable is long enough to reach your car from the wall. The new standard is about 25 feet for comfortable reach. Some cheaper chargers come with only 18-20 foot cables, which can be awkward if your outlet is far from the parking spot. If you need extra length, some brands offer optional extensions.
Durability and Warranty. Look for a solid build and good warranty. Metal enclosures (cast aluminum) are stronger than plastic ones. The Grizzl-E has an industrial build. Warranty length is also telling: for example, Tesla offers 4-year coverage on its new Wall Connector, which is among the longest. A 2–3 year warranty is common.
Safety Features. Some chargers include extra safety sensors. The IYILO charger, for instance, has an outlet heat sensor that slows charging if the outlet overheats. All quality chargers will have ground-fault protection and meet UL or ETL safety standards.
Brand and Support. Established brands (ChargePoint, JuiceBox/Enel X, ClipperCreek, Tesla, etc.) have proven reliability and support. New brands can be more affordable but check reviews (EnergySage’s 2026 list is a useful resource). Consider whether you want Wi-Fi updates, customer service, and a mobile app.
In summary, the “best” charger matches your car’s connector, meets your power needs (amp rating), fits your budget, and has the features you want (smart controls, waterproofing, long cable, etc.). If you have solar panels or a weak panel, look for chargers with load management features. If you rent or move often, a plug-in model might be better. Think through your daily driving habits and home setup.
Electric Car Charger Installation
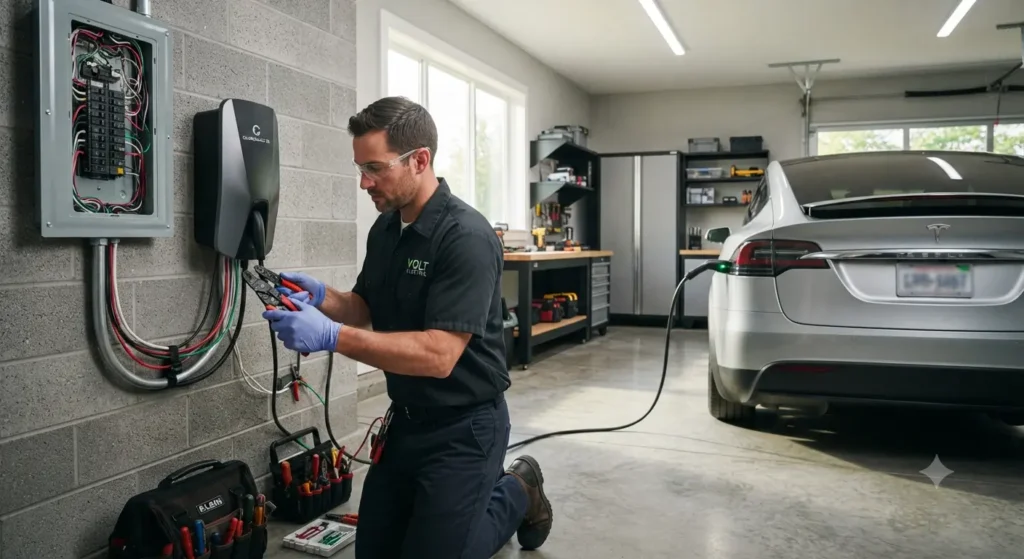
Installing a Level 2 home charger is a project for a licensed electrician, not a DIY weekend project. It involves high-voltage work and usually requires permits. Here are the typical steps and considerations:
- Assess Your Electrical Panel: A 240V charger draws a continuous 40–48 amps, so you need enough panel capacity and a free double-pole breaker slot. Most modern homes have 200-amp service, which is ideal. If you have only a 100A panel or no free space, you may need a panel or service upgrade (often $1,500–$3,500 extra). Some homes add a subpanel if slots are full (about $500–$1,500). An electrician will check your panel’s amperage and slots before quoting.
- Choose Location: Plan where to mount the charger. Garage walls are most common (keeps the unit indoors or sheltered). If garage is far from panel, an outlet may be closer. Outdoors is possible but requires weatherproofing. Remember: longer distance from panel means more wiring cost. Ideally, pick a spot within 20–30 feet of the panel to limit labor and materials.
- Hardwire vs Outlet: Decide if you want the charger hardwired or plug-in. A hardwired unit (wired directly to a breaker) is permanent and often allowed only for maximum amperage. A plug-in unit connects to a 240V outlet (NEMA 14-50) – this is semi-portable. Either is fine, but the electrician will need to install a new outlet or run permanent wiring accordingly.
- Permits and Codes: In most places a Level 2 charger installation requires a permit and inspection. The permit cost is usually $50–$250. The electrician should pull the permit, do the work by code, and schedule an inspection. Never skip the permit: unpermitted work can void your insurance and cause problems later.
- Electrician Work: The electrician will run a dedicated 6 AWG (for 40A) or 4 AWG (for 60A) copper wire from your panel to the charger location, install a suitable circuit breaker (usually 50A or 60A), and mount the charger or outlet. This can take a few hours, longer if there are obstacles. If installing in a detached garage, expect extra cost for conduit or trenching.
- Testing: After install, the electrician will test the circuit and charger. They should verify proper voltage, that the GFCI (ground-fault) protection functions, and that the car charges safely.
- Final Steps: Once installed and inspected, register for any tax credits or rebates. In the U.S., there’s a 30% federal tax credit (up to $1,000) for home EV charging equipment. Many states/localities also offer rebates or credits. These can offset your costs. Keep invoices and permit docs for taxes.
Installation usually takes 1 day if it’s simple (panel nearby, existing conduit), but can take longer (weeks) if panel upgrades or extensive wiring are needed. The electrician’s work is critical: charging equipment involves high power similar to appliances like ovens, so professional safety checks are important. In fact, EnergySage warns “never DIY your EV charger installation” due to safety and code issues.
Tip: If you expect future power needs (like adding another EV), talk to the electrician about installing extra conduit or a subpanel now, which can save cost later. Also, discuss whether a charger with load management (like Emporia Pro) could avoid a panel upgrade by shaving power when needed.
How Much Does a Level 2 Charger Cost?
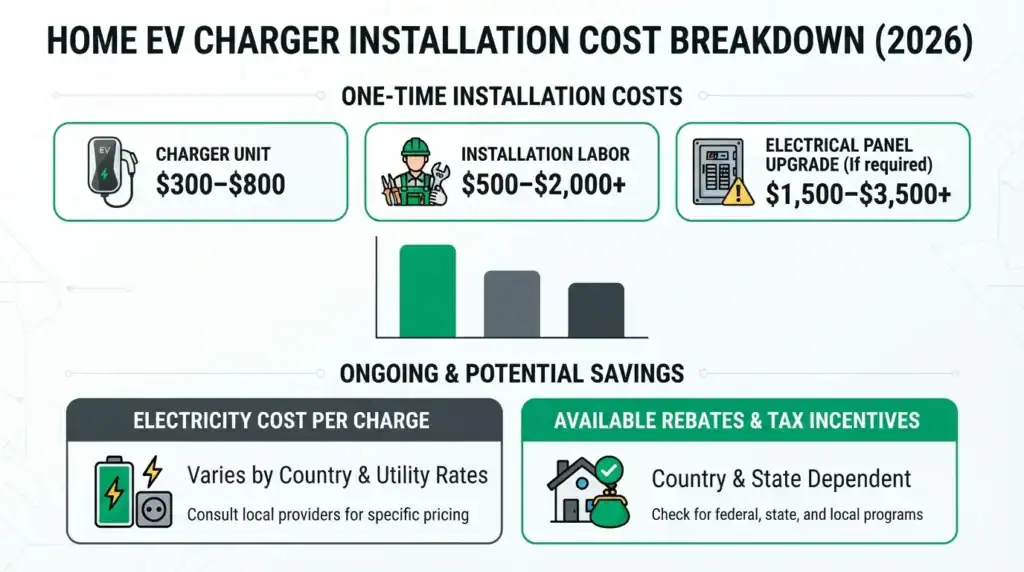
Charger Unit:
The unit itself typically costs $300–$600 for a good Level 2 charger. Lower-end models (around $200–$329) provide 32–40A charging with basic features. Mid-range units ($330–$499) offer 40–48A, Wi-Fi/app control, and a few years warranty. Premium chargers ($500–$800+) add weatherproofing, load management, or longer warranties. For most home users, a 40–48A smart charger in the $350–$500 range is a sweet spot.
Installation:
A straightforward 240V outlet installation (plug-in charger) often costs $500–$1,500 total. EVIQO notes a “simple plug-in… can be under $700” including labor. However, if you hardwire the charger or need a long cable run, costs rise. A “typical” install (30–50 ft wire run, hardwired) might be $1,100–$1,900 before tax credits. If you need a panel upgrade or sub-panel, it can jump to $2,200–$4,500 or more. In extreme cases (old panel, 100A->200A upgrade) total install can exceed $4,000.A local electrician quoted $800–$2,700 for most installs, aligning with these ranges. Permits ($50–$250) and materials (wire, conduit) are included in that. We recommend getting multiple quotes to compare labor rates.
Operating Cost:
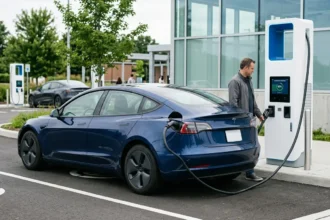
Charging cost depends on your electricity rate. EVs use ~25–40 kWh per 100 miles, so at $0.13/kWh U.S. average, that’s $3–$5 for 100 miles. (Check local rates for accurate figures.) Public fast chargers are usually more expensive per kWh, so home charging often costs less per mile.
Taxes & Incentives
Remember to factor in incentives. In the U.S., the federal tax credit covers 30% of purchase+install (up to $1,000). Many states and utilities offer rebates or lower charging rates at night. In Europe, countries like Germany or France may offer grants or VAT reductions (check your local schemes). These can significantly reduce net cost.
Summary: Expect to pay roughly $800–$2,000 total for a mid-range Level 2 charger and install if your home is already 200A-capable and the panel is near the garage. The charger alone is a few hundred dollars, and installation usually adds another few hundred to a couple thousand. Always include permit fees and consider any panel work.
Best Home EV Charger Features
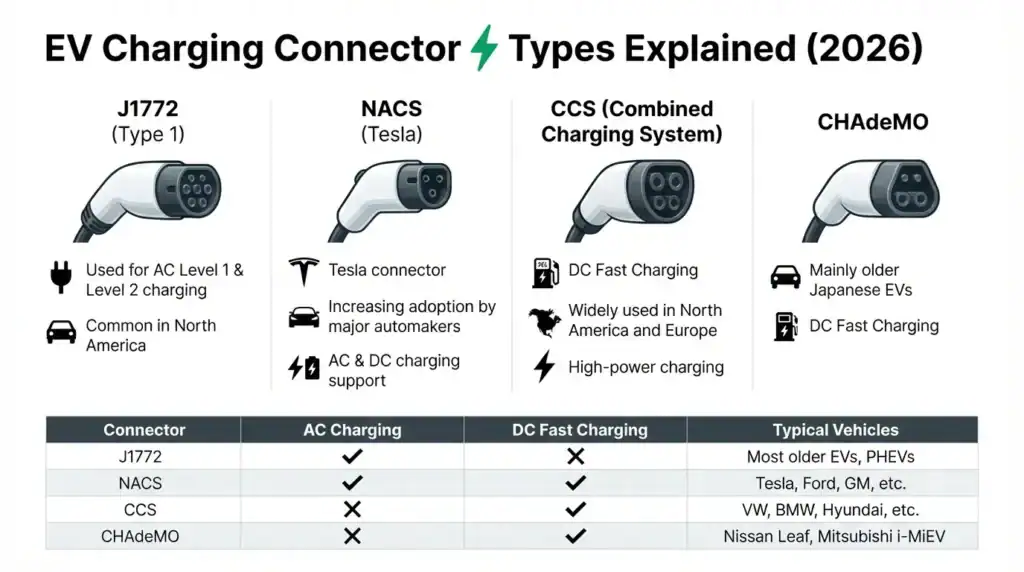
When comparing specific chargers, look for these features:
- High Amperage (48A/11.5kW): Chargers limited to 32A (7.7 kW) are less common now. A 48A charger will draw 40A continuous and deliver ~30+ miles/hr on a 240V supply. If your car supports 11 kW charging (many do), a 48A unit future-proofs your home.
- Wi-Fi and App Control: A Wi-Fi-connected charger lets you schedule charges, monitor power, and get firmware updates. Apps can let you track energy usage. For example, Tesla’s new Wall Connector can be controlled via the Tesla app, and Emporia’s app shows whole-home energy use.
- Load Management: Some smart chargers (like Emporia Pro) include load-sharing. If you have a weak panel, the charger can reduce power when needed to avoid tripping breakers. This can save you the cost of a panel upgrade.
- Safety Sensors: Overheat or leakage detection can automatically pause charging if something goes wrong. The IYILO charger’s outlet heat sensor is one example.
- Durable Enclosure: Look for a NEMA 4 or IP65+ rating for outdoor use. Grizzl-E’s cast-aluminum box is known for durability. Plastic cases are lighter but less rugged.
- Cable Quality: A good gauge and a long, flexible cable (25 ft or more) are important. Check if the cord is thick enough for 40–48A (typically 6 AWG).
- Connector Compatibility: Some chargers are single-standard (only J1772 or only NACS). Others, like the Tesla Universal Wall Connector, handle both. Make sure you get the right type.
- Mounting Options: Do you want the charger to swivel for different parking spots? Some models have holsters for neat storage (ChargePoint Home Flex has a rotating hook, for example).
- Warranty: Longer warranties (3+ years) indicate confidence in the product. Tesla’s 4-year warranty is above average. Some lesser-known brands offer only 1–2 years.
- Brand Support: Established brands (ChargePoint, ClipperCreek, JuiceBox) often have solid customer service and easy user interfaces. Newer brands might save money but read reviews carefully.
Choosing a charger with the right set of features can improve reliability and user experience. For instance, a homeowner with solar panels and an older 100A panel might prioritize a charger with load management (like Emporia Pro) to avoid upgrading their electrical system. A renter might pick a plug-in JuiceBox or ChargePoint that they can take to a new home. Evaluate your scenario, then pick the model that fits.
Practical Tips
- Charge Overnight: Electricity rates are often cheapest at night. Set your charger (or your car) to start charging after midnight to save money.
- Schedule Wisely: If you’re on a time-of-use plan, program the charger to run during off-peak hours. Many smart chargers and cars allow scheduled charging.
- Partial Charging: You don’t need 100% all the time. In fact, battery experts often advise stopping around 80-90% for daily use to prolong battery life. Check your EV’s manual.
- Check Permits Up Front: Before buying a charger, confirm local requirements. Getting a permit in advance avoids headaches or fines later.
- Consult an Electrician Early: Early in your car-buying process, ask an electrician if your home panel is ready for an EV. It’s cheaper to add a 60A circuit while building a house or doing other renovations.
- Use Incentives: Don’t forget to claim tax credits and rebates. Keep receipts and the product manual for tax time.
- Maintain Your Charger: Wipe off dust and debris, and inspect cables periodically. Many units have a self-test mode—run it annually if available.
- Plan for Growth: If you expect a second EV in the future, consider installing a 60A breaker or leaving space in your panel now.
- Avoid Derating: If possible, avoid using multi-plug extension cords or adapters that aren’t UL-listed. Use the charger as designed.
Common Mistakes to Avoid
- DIY Installation: Don’t try to wire it yourself. EV chargers run at high voltage (240V) and require code compliance. Only a licensed electrician can ensure it’s done safely.
- Skipping Permits: Every electric upgrade should be permitted. Skipping it can void home insurance and require costly fixes.
- Ignoring Panel Capacity: Assuming your panel can handle the charger is risky. Always have an electrician check or add a subpanel if needed.
- Poor Location: Don’t mount the charger far from the panel or parking spot. Long wire runs (through walls or underground) add hundreds of dollars.
- Wrong Connector: Make sure the charger plug matches your car. A Tesla charger without a J1772 port won’t fit a Nissan Leaf or Chevy Bolt unless you use an adapter.
- Cramming Installation: Conduits and wires need space. Overcrowding your panel or pulling too many circuits can cause issues. Let the electrician plan the layout.
- Neglecting the Outlet: If choosing a plug-in unit, use a proper 50A outlet (NEMA 14-50) with the right gauge wire. Some people mistakenly use 30A outlets (which cannot support Level 2 safely).
- Short Cable: Don’t get stuck with a cable that’s too short for your parking. Double-check length before purchase.
- Ignoring Weather: Don’t put an indoor-only charger outside. If your parking is uncovered, invest in a weatherproof model or enclosure.
- No Future-Proofing: Forgetting that many new EVs use the Tesla/NACS standard after 2025. If you upgrade your car later, ensure your charger or adapter will still work.
Frequently Asked Questions
Q: How long will it take to charge my EV at home?
A: It depends on your charger and battery size. A Level 1 (120V) charger might take 20+ hours to fill a large EV. A Level 2 charger (typically 40A) will often add ~20–30 miles of range per hour. For example, on a 60 kWh battery, a 40A charger could go from 10% to 90% in ~6-8 hours. For exact times, divide the battery kWh by the charger’s kW output.
Q: Do I need a special outlet or circuit?
A: Yes, a Level 2 home charger needs a 240V circuit. Most installations use a 50A double-pole breaker and either hardwire the charger or use a NEMA 14-50 outlet. Level 1 chargers just use a standard 120V outlet (no permit needed). Always let an electrician handle adding any new outlet or breaker.
Q: Can I install a charger myself or get an electrician to do it?
A: Hiring a licensed electrician is strongly recommended. They will get the required permits, follow electrical codes, and ensure safety. Self-installation risks fire hazards and code violations. Energy experts advise never DIY an EV charger install.
Q: Are home EV chargers safe in the rain?
A: Yes, if the charger is outdoor-rated. Many Level 2 chargers have weatherproof enclosures (NEMA 4, IP65, etc.). Always mount it according to the manufacturer’s instructions. Inside a garage or covered area is best. Even outdoors, modern chargers are designed to handle weather, but avoid submerging them.
Q: What’s the difference between J1772 and NACS connectors?
A: J1772 (Type 1) is the standard plug on most non-Tesla EVs. NACS (formerly Tesla) is the plug used by Teslas and, starting around 2025, by many other brands in North America. A J1772 charger won’t fit a Tesla unless you use a J1772-to-Tesla adapter (Tesla vehicles come with one). Likewise, a Tesla charger (NACS) needs an adapter to plug into older EVs. Many new chargers support both or have adapters available.
Q: Will charging at home wear out my EV battery faster?
A: Normal home charging is generally gentle on modern batteries. It’s true that fast-charging (Level 3/DCFC) can heat batteries more. At home you’ll usually charge at 6–11 kW. To prolong battery life, avoid charging to 100% all the time. Many drivers charge to ~80–90% for daily use. Also, try not to leave the car at 100% too long. In short, home charging is fine; just use moderate charge levels and your car’s battery management will handle the rest.
Q: Is it cheaper to charge at home or at a public station?
A: In most cases, charging at home is cheaper and more convenient. Public fast chargers often charge higher rates per kWh or session. Home charging uses your residential electricity rate, which is usually lower. If you have time-of-use rates, charging at night can be very cheap. Always compare your utility rate vs. local charging fees, but expect home charging to be less expensive per mile.
Q: How do I claim the tax credit or rebate?
A: Save all your receipts for the charger and installation. In the U.S., you claim the federal 30% credit (up to $1,000) on IRS Form 8911 when filing taxes. Some states have online portals for rebates. Check your state’s energy or transportation website for programs. Utility companies sometimes have rebates as well. Call your utility or search “EV charger rebate [Your State]” to find details.
Conclusion
In summary, the best home EV charger in 2026 is usually a Level 2 (240V) charger with 40–48A output, properly matched to your vehicle’s connector. This setup will recharge a typical EV overnight. Compare models on power (amps), connector compatibility, smart features, and durability. Account for installation: hire a licensed electrician, plan the circuit location, and secure permits. Typical costs are in the low thousands (often offset by tax credits).
Home charging makes EV ownership convenient and cost-effective. By choosing the right charger and installing it correctly, you’ll enjoy reliable daily charging at a predictable price. For more on home charging and EV care, see our EV Charging Guide and Best Electric Cars. The road to fully electric driving starts at home!